
Today, you are going to learn how to mine Z-Cash on your newly built Hackintosh (or Mac Pro) running an NVidia GTX 1080 GPU in my first guide and tutorial for Nerd-Tech.net.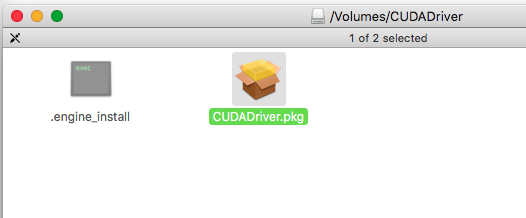 Follow the steps all the way through until it is fully installed. If the installer asks you to reboot, do it. Then move to step 2.
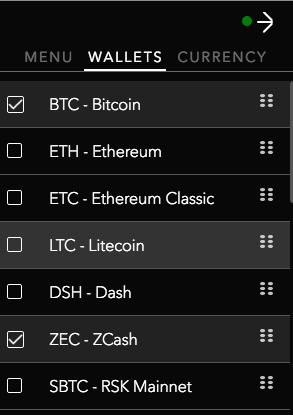 Once it’s checkmarked, you may click back on the main Jaxx screen. Then click on the little blue “ZEC” icon on the top of Jaxx. Below this, you should see the words “Your Current ZCash Address”, with a bunch of random numbers and letters beneath that. These random numbers and letters are the Jaxx wallet address to receive Z-Cash that you have mined. Now, Minimize Jaxx, open up your web browser again, and proceed to the next step.
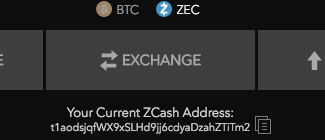 Click on this icon until the bottom of Jaxx shows a green popup that says “Copied To Clipboard”. Go back to your Suprnova web page. Click on the empty field under “Payment Address”, and paste your copied text into that box! Then change the “automatic Payout Threshold” field to 0.001, click the “Update Account” button beneath that. Then log out of Suprnova, and proceed to step 6.
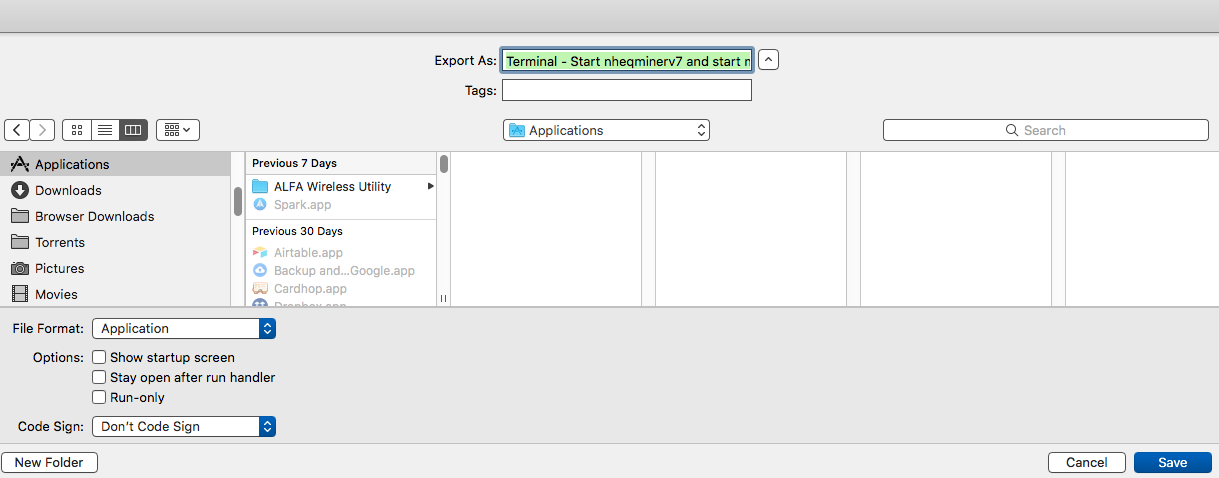 Next, Locate your new app file labeled “Terminal – Start nheqminerv7 and start mining Z-Cash (Nerd-Tech.net).app”, and drag your new app to your applications folder. Now that you have saved your script as an app, its time to start mining at boot. Open System Preferences. Click on the “Security & Privacy tab”, scroll down to Accessibility and click on it. If your preferences are locked, now is the time to click the unlock button in the bottom left of the preferences pane, then, enter your password. Next, hit the + symbol. In the window that pops up, locate your “Terminal – Start nheqminerv7 and start mining Z-Cash (Nerd-Tech.net).app” file within your Applications folder. Select your app file and click “Open”.
 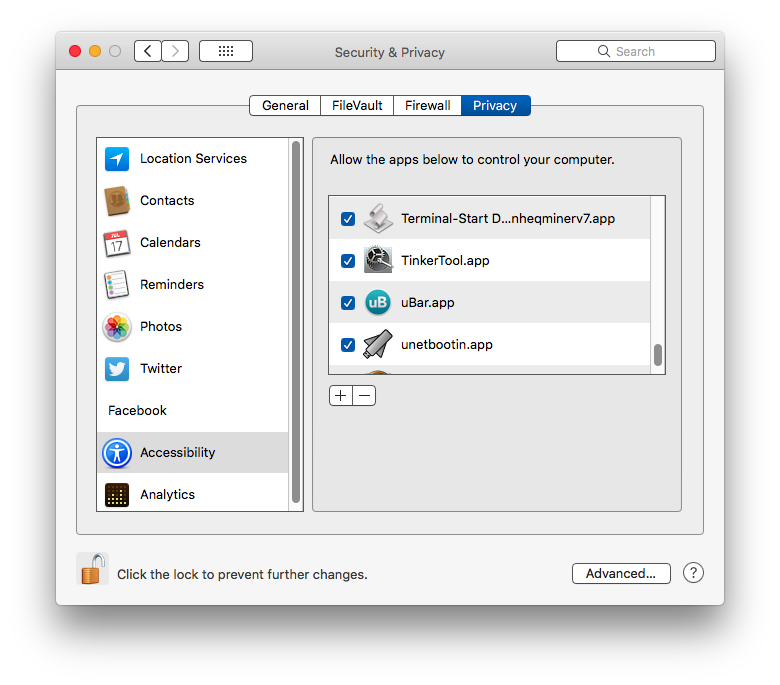 Now, double check to make sure your new app is check marked in that window. If not, check it. If so, read forth. Next Click on your main “System Preferences” window, then click on the “Users & Groups” category. Select your user name, then click on the “Login Items” tab. Beneath the “Login Items” tab, is another + (plus) sign. Click on the Plus sign, and once again locate your newly created app and then click the “Add” button. Close System Preferences. At this point, if you’ve done everything correctly, you should be able to reboot, and on boot, your new mac app will automatically open the Terminal and start mining, depositing mined coins directly into your Jaxx Wallet. Give it a try. If it doesn’t work, you or you get errors, you might have to adjust the “Delay X” command in the apple script you created to compensate for slow load times at boot. Otherwise, go back and repeat all of the steps carefully.
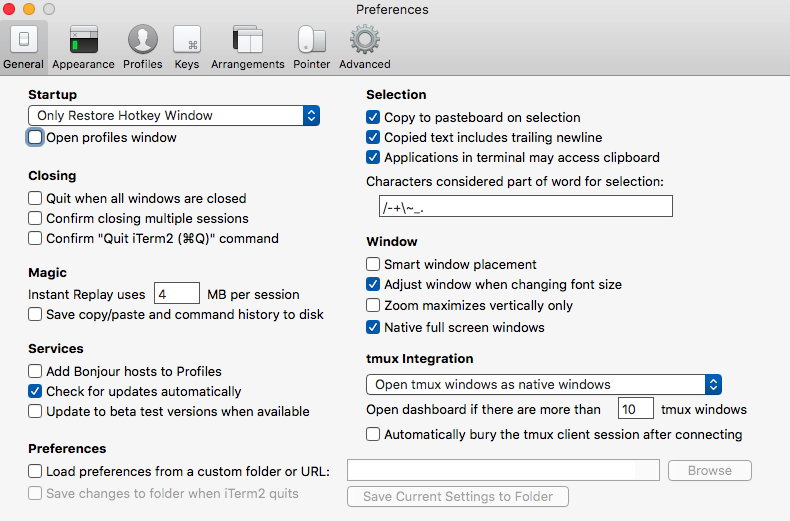 The Hotkeys settings section should look like this:
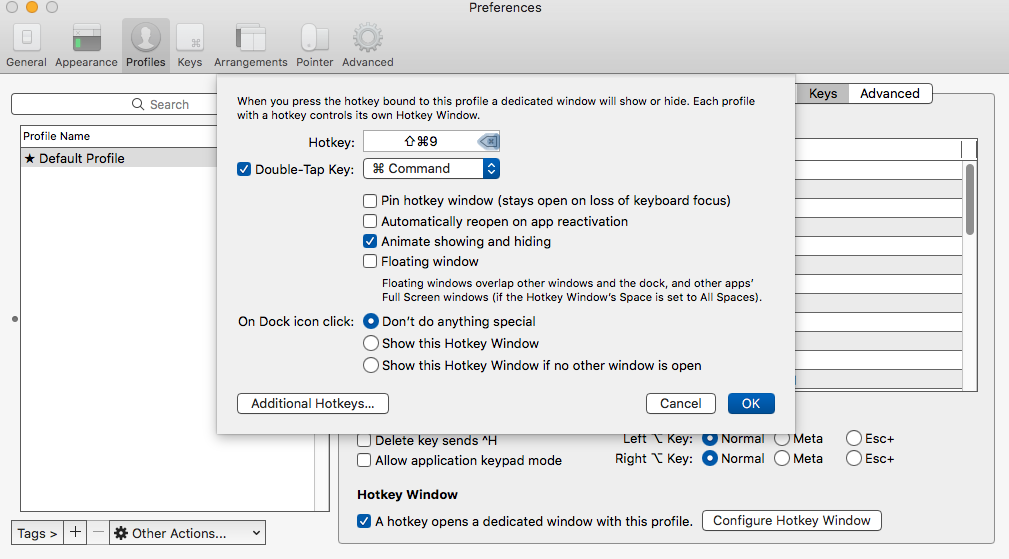 Lastly, once again, you may want to adjust the
Preperation
(or click here to skip to step 1)- Be sure you have properly installed your up-to-date alternate Nvidia Webdrivers for Mac OS on your hackintosh. If you do not have these installed, research the Tonymacx86 website on how to download and install them. Or use my quick links to download NVIDIA Alternate Graphics Drivers for macOS 10.13.4 (17E202) or download NVIDIA Alternate Graphics Drivers for macOS 10.13.4 (17E199).
- To determine what download link you should use, you must first determine what build of mac OS you are running. To determine your Mac OS Build
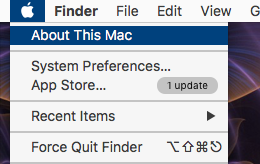 , click on the icon, and then select “about this mac”. Once the about menu pops up, you must click your mouse on the version number (maybe double click) “10.13.4” in order to reveal the build version of your Mac OS.
 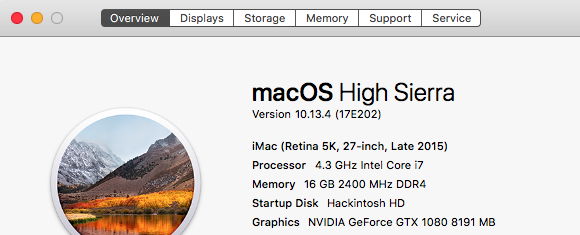 Once the version is revealed, you can use that build number to download the matching NVIDIA graphics driver installation package. Do this, and then install your Nvidia driver by double clicking on the downloaded package.
 - This is as far of detail as I am going to go to get your webdrivers working, as if you are reading this article, they should be working already. On to step 1 for more downloads and preparation.
Step 1) Install the Nvidia Cuda drivers for Mac OS High Sierra.
Before running nheqminer on Mac OS, you will need to go to the Nvidia Website and select latest Cuda Driver release (currently CUDA 396.64 driver for MAC:Release Date: 05/17/2018) and follow the links to Download it. Otherwise you can download it by clicking HERE. After it’s downloaded double click on the file “cudadriver_396.64_macos.dmg” to open it. Then double click on the “CUDADriver.pkg” to run the installer. Follow the steps all the way through until it is fully installed. If the installer asks you to reboot, do it. Then move to step 2.Step 2) Install Cuda Toolkit Version 9.1.128
Before proceeding, if you think you may have already installed Cuda Toolkit, you can go a head and check by opening up the terminal app, copying and pasting this the following command:cat /usr/local/cuda/version.txtCUDA Version 9.1.128cat: /usr/local/cuda/version2.txt: No such file or directoryStep 3) Install Apple’s Command Line Tools macOS 10.13 for Xcode 9.2
Go to https://developer.apple.com/download/more/ and login with any valid Apple ID username and password. Once you have logged in, scroll down until you see “Command Line Tools (macOS 10.13) for Xcode 9.2”. Click on it, then click on the blue text “Command Line Tools macOS 10.13 for Xcode 9.2.dmg” to the right of it and start downloading. Once the file is downloaded, double click on it to open up a window. Then in that new window, double click on the “Command Line Tools (macOS High Sierra version 10.13.pkg” file, to open up the installer. When the installer window pops up, Click the “Install” button, enter your Mac OS password, and proceed with the instructions to complete the install. Once finished, Mac OS may ask you to reboot. If so, do it.Step 4) Install a Z-Cash wallet (recommended JAXX)
Go to https://jaxx.io/downloads.html and click the Download link next to “Desktop (Mac)”. Once the “Checksums” window pops up, click the Download button again. Leave the sha1sum popup window open while you wait for your download to finish. Once your file entitled “sha1sum Jaxx-1.3.15.dmg” is finished downloading, and then open up terminal copy (the entire contents of the box including white space) and paste this code:shasum -a 1 shasum -a 1 /Users/yourusername/Downloads/Jaxx-1.3.15.dmg136aa4666f1e11c9e894585c40bafc48b16065b1Step 5) Register and set up a mining pool account with suprnova
With your web browser open, go to the following address: https://zec.suprnova.cc/index.php?page=register and register yourself with zec.suprnova.cc. Once in the suprnova website and logged in, set up your account. Then proceed to set up your worker. In the Suprnova menu on the left, click on “My Account” then click on “My Workers”. A screen will show up with an “Add New Workers” box. In this box fill in your worker name as “user”, and your Worker password as “password”. Now, hit the “Add New Worker” button. If done correctly, you should now see a box under “Worker Login”, that displays your user name on the left, and then your new worker labeled “user”, on the right. Your worker password “password” should be filled in on the “Worker Password” field. Next, go back to the left side of your browser and click on “My Account” again. On the “My Account” page, you will see a text box entitled “Payment Address”. Now, go back to your Jaxx App. In Jaxx, Click on the blue icon with “ZEC” next to it. Below that is “Your Current ZCash Address:”, and just to the right of that is a little icon of two pieces of paper.Click on this icon until the bottom of Jaxx shows a green popup that says “Copied To Clipboard”. Go back to your Suprnova web page. Click on the empty field under “Payment Address”, and paste your copied text into that box! Then change the “automatic Payout Threshold” field to 0.001, click the “Update Account” button beneath that. Then log out of Suprnova, and proceed to step 6.Step 6) Download and set up nheqminer for macOS
Go to the nheqminer releases page at https://github.com/kozyilmaz/nheqminer-macos/releases and click on the big blue link labeled: “nheqminer-macos-v7.tar.bz2” to download the latest release of nheqminer for mac. Otherwise, you can download it directly from THIS LINK. Once downloaded, double click the compressed file to extract it. A folder named “nheqminer-macos-v7” should appear. Drag this folder to your “Applications” folder. Proceed to step 7.Step 7) Automate your Mac (Hackintosh) to start mining Z-cash on boot with Script editor.
Go to my downloads page and click on the download entitled “Terminal – Start nheqminerv7 and start mining Z-Cash (Nerd-Tech.net).scpt”, located under the “Mac OS Scripts” section of the Downloads outline. If you can’t find it, you can also just download it by clicking on THIS LINK. Once the file “Terminal – Start nheqminerv7 and start mining Z-Cash (Nerd-Tech.net).scpt.zip” is downloaded, double click the zip file to extract the .scpt file. Now right click on the newly extracted file named “Terminal – Start nheqminerv7 and start mining Z-Cash (Nerd-Tech.net).scpt”, and select “Open With>Script Editor”. Script editor will open a window and you will see the following codetell application "Terminal"
if not (exists window 1) then reopen
activate
delay 15
end tell
activate application "Terminal"
tell application "System Events" to keystroke return
tell application "System Events" to keystroke "cd /Applications/nheqminer-macos-v7"
tell application "System Events" to keystroke return
tell application "System Events" to keystroke "./nheqminer-gpu -l zec.suprnova.cc:2142 -u usernamegoeshere.user -p password -cv 0 -cd 0"
tell application "System Events" to keystroke return
tell application "Terminal"
activate
delay 2
end tell
tell application "System Events" to tell process "Terminal" to set visible to false"./nheqminer-gpu -l zec.suprnova.cc:2142 -u Mistermonkey.user -p password -cv 0 -cd 0"Step 7b) Mining with iTerm instead of Terminal (Optional)
If you would like to start mining using the “iTerm2” app to do your mining, instead of the default terminal app, Then you can instead download the “iTerm – Start nheqminerv7 and start mining Z-Cash (Nerd-Tech.net)” script from my Downloads Outline page. Getting iTerm2 to work on boot is a little bit trickier. The script that I wrote for it works, but it carries a few assumptions that aren’t set iTerm settings, that aren’t the default settings. Therefore, in order for the script to work, you must go into iTerm and configure it’s hotkey settings. In iTerm>Profiles>Keys (tab)>Configure Hotkey Window (button). Click on the “Configure Hotkey Window” Button. Once this window opens, click in the “Hotkey:” Box, and creat the global hotkey to be , that is; the command key, the shift key, and the #9 key all together. That needs to be your global hotkey in iTerm2 settings. Furthermore, the iTerm2 “General” page, should look like the below picture: The Hotkeys settings section should look like this: Lastly, once again, you may want to adjust thedelay 15DONATE! If this tutorial it worked for you (which it should have), you could spread the love back and donate some change to my paypal, bitcoin address, or altcoin addresses.
PAYPAL:BITCOIN (BTC) ADDRESS:
bc1qxsqy0nl8f2rqsgpzzr8eh3c67vz7kjr2djyku4qzdkv8sz8zf57urafd8urhg7jdej6u892v3z088nvr0x8C33CD44a083D605DBb65Ba4eC201f30Af88705ct1dxu9KN1pSYNoMNxYMzCNhcHJhGZmwPW9n4A2p4k6vSGviUxoZvwQkAX8VBQE6tQncmZUS5mZ8YS9cZ2BQ4cc2CZXdMVg4vtFoxh3XrXQECWm95Gq2FpyRtvFz2yNZuYy
Final Info: Hash Rates
Unless Someone on the mac side refines and improves the code for the 1080 being run on Mac OS, You aren’t going to get hash rates that are better than Windows or Ubuntu. But if you absolutely need to use your mac (or Hack) with Mac OS often, and figure, mining something is better than mining nothing, well here you go. My hash rates range anywhere from 368.933 Sols/s to 406.667 Sols/s. If you manage to get hash rates higher then that please post and let us know your formula!FINISHED! If you have any further questions, feel free to take a look at my Contact Form to get in touch with me. Cheers and happy Mac Mining!